kintsugi
2022-12-15 · 6 min read
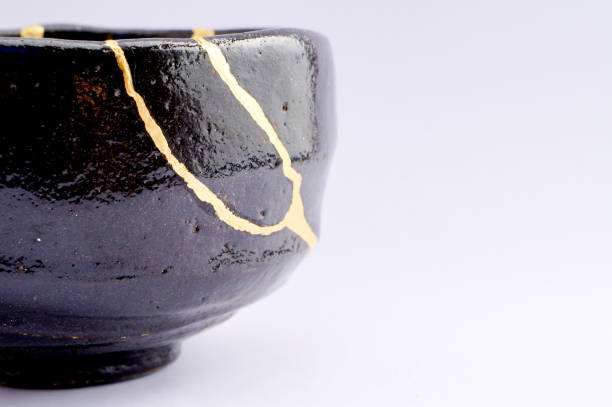
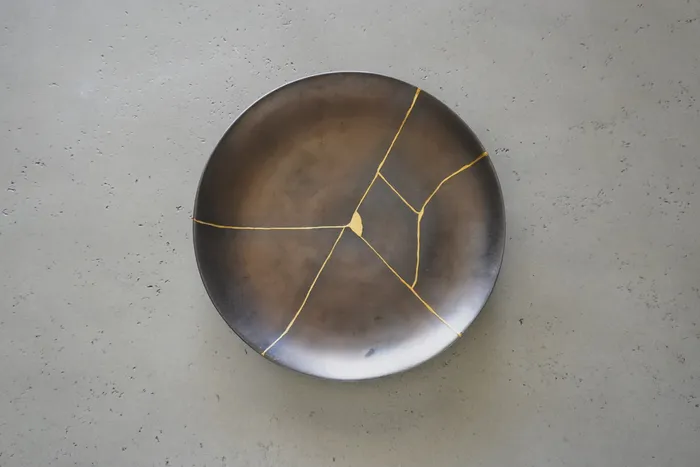
Kintsugi (金継ぎ, "golden joinery") is the Japanese art of repairing broken pottery by mending the areas of breakage with lacquer dusted or mixed with powdered gold, silver, or platinum.
As a philosophy, it treats breakage and repair as part of the history of an object, rather than something to disguise.
First, watch this introductory 5 min video: https://www.youtube.com/watch?v=QEJ23t940UY
philip's first attempt #
With the broken pieces in front of you, first "dry fit" them together and plan the order you'll join each piece.
The fewer pieces you have, the easier it'll be. Two or three separate pieces seems best as far as outcome, but you usually don't get to choose how your favorite bowl shatters on the kitchen floor : )
Lightly sand the edges, then wash the pieces to get rid of the dust. Quickly dry with a paper towel.
Now you're ready to glue pieces together! You can either try to glue everything in one go, or play it safe and glue one section at a time, letting the join dry for an hour or two and only then gluing the next section. I tried to glue all 5 of my pieces together at once and it was definitely too much. Next attempt I'll probably go one-at-a-time.
Prepare the glue and (fake) gold powder mix. Now's also a good time to lay out a piece of cardboard to work on. Uncap the epoxy (don't worry, it's resealable!) and press out so you get even parts of each epoxy component. Then put a small bit of gold powder on the liquids. You need a lot less than you think! Add just a little bit, mix in with the epoxy, and see if it looks good. Worst case it looks a bit thin and you just add some more powder.
Mix the epoxy thoroughly. I spent maybe 1m 30sec mixing. Really scrape up the stuff on the surface and mix it up, otherwise the epoxy won't bond properly.
With a cheap wooden chopstick or plastic knife, gather up a little gold glue and bead it along one edge of a piece. You want enough so that it bulges out just a little when pressed together. One good reason to do a pair of pieces at a time is that you'll learn how much you need after the first join, and won't be rushed on the next. You may also need to add a little extra to fill in areas where the ceramics are chipped and don't sit flush.
Press together the two glued pieces and hold until it sets. Repeat for all the different pieces.
Once the piece has dried, you can do a final "touch up" with an x-acto knife. Scrape off any stray splatters or cut-even any messy lines. Do this carefully so you don't leave any big marks.
If you really mess up and accidentally smudge the glue before it's set (like I did), or just don't like the look, you can try again. Take an x-acto knife and scrape/cut off the glue above the join, leaving the pieces still glued together and the surface now flush. Maybe sand it a bit too? Who knows. Unfortunately, the glue beneath the surface isn't as shiny, so mix some more glue + gold powder and this time lay a small, thin layer on the already-glued surface.
The pros seem to do this by painting a clear glue on the surface with a very thin brush, then dusting the gold powder on top. I don't have a brush though, so I just mixed the glue+powder and used another chopstick.
As a final note, the epoxy I bought doesn't appear to be food safe, so don't eat with your repaired ceramics!
other helpful resources #
A useful comment from the video:
Firstly, if it's for something you eat on then it needs to be food-safe this is less to do with actually eating it and more about toxic stuff that can come out when you wash it or if it comes into contact with acidic foods or something. Food safe glue sometimes it's sold as 'epoxy' rather than glue. The recommendation is to ask your local arts & craft store about it as there are literally hundreds of brands.
Secondly, even if you find food-safe glue just beware that most glues are not designed to withstand boiling water so gluing a teapot like this might not be the best idea.
Thirdly, the recommendation is to use a two-part mix glue (like you have to add the parts together first before gluing) they are usually slower drying and thicker. You want the glue to make up part of the crack (as compared to superglue which is so thin you can effectively attach two pieces together with no gap) Another recommendation is to mix the gold powder in with the glue first, so it's gold powder suspended in the glue. just because the dusting on at the end makes quite a thin covering and it can wash off easily if you rub it however if you are using actual gold then don't do that as it's a huge waste. We used craft store gold powder.
Lastly, another recommendation is to glue it first, then sand it back, and then use a fine brush to add some more glue and gold powder so the lines are thinner, more delicate, and flush with the ceramic.
Unfortunately, the epoxy I bought doesn't appear the be food safe, so these will just have to be for display only.
Another nice video: https://youtu.be/eO9CnS-NqO8
The next step is to sand the edges. It took me about an hour. My theory was to sand the "edge-of-the-edge" on each piece, so there would be a bit of a gap between two broken pieces, but the two pieces would still fit together exactly in the mostly unsanded middle.
Swap between sanding an edge, then fitting it together and looking at the gap, then back to sanding some more. Imagine there is gold between the gap; keep sanding if you want more gold to show. If you don't sand much, you'll get a hairline strip of gold. If you sand more, you'll get a wider, thicker join.
Though this didn't work as well as I thought.
wishlist for next time #
- a fine brush for detail work
- a new x-acto knife
- want to try some polish-level grit sandpaper
- buy a higher end kit with real gold + silver powder: https://kintsugi-kit.com/products/traditional-tsugukit-gold-silver
- follow this blog's more legit process: https://fellerts.no/projects/kintsugi.php